Showing posts with label beauty. Show all posts

Friday, November 29, 2013

MW's Sigma Brushes Review

Hi Whirlers,

Hope all are well! 

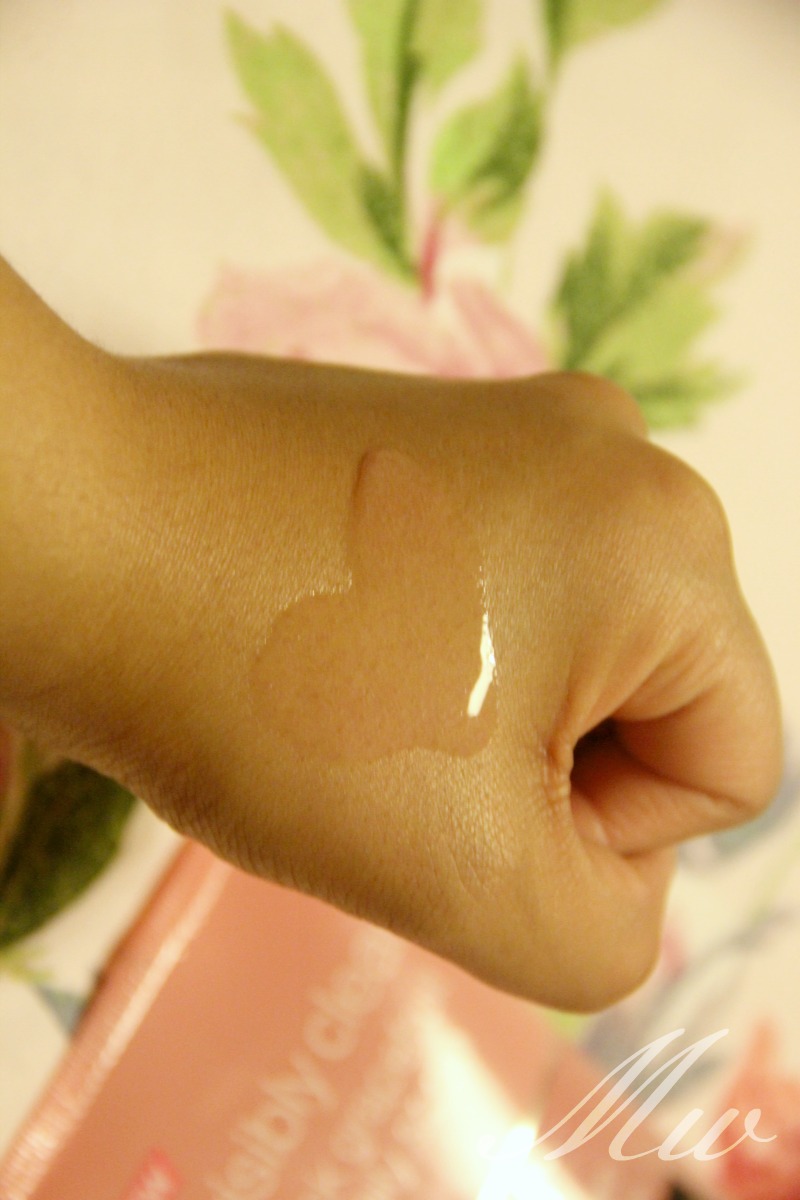
I purchased Mr Bunny Kit Sigma Brushes back in January (I know, so long ago). I had been contemplating on purchasing these for a very long time. It was an expensive purchase for my personal budget, so the purchase had to be completely justified - ensuring I didn`t feel guilty with the purchase!

I took the plunge and got my bank card out and forked out $143.42 (including P&P, discount code and an extra make up brush) which converted to £92.09! Yes, I know. Ridiculous for make up brushes. But, then on top of this, I had to pay £15 for tax or customs or something. Gah. So, I spent £107.09 on make up brushes?! Insane. So, I was a tad bummed about this. Wasting so much money on brushes like that. Smh. 

HOWEVER...

Justifications for purchase:
  • I needed good quality make up brushes as my current brushes were a mismatch assortment, ranging from Urban Decay to No 7 to even Asda ones (which, might I add are surprisingly good?!)
  • I did research on Sigma, checked out blog reviews,youtube videos, etc
  • I will not buy any more brushes for a VERY long time...and, 11 months later, I haven`t!
  • I have so much make up, but never apply it because I don`t have the correct tools, therefore, if I buy these brushes I can experiment more...
Surely, they`re good reasons to buy make up brushes? 
*anxious*

I`ve been using them for almost a year now, some of the brushes I absolutely love and use all the time, and a couple which were a slight disappointment. Carry on reading to see which ones I loved/what I use them for!


The brushes are presented in a container, which can be used as a brush holder, which is great for people who put their brushes in pots on their dresser. I don`t, however, as I`m allergic to dust so I keep mine in a drawer - I ought to show you how I store my make up one day!


The Mr Bunny Kit Sigma Brushes has 12 brushes in total. This is one of the factors that drew me to this kit, as it has a large range of different brushes for a complete set. And, the fact the brushes are synthetic, which means they will shed less when cleaning.

FACE BRUSHES


F30 - Large Powder Brush


 Now, everyone is completely aware of my obsession with bronzers and I love to use a large brush for applying products to my cheeks. This brush is huge and the bristles are ever so soft to the touch and pick up product well. I use this for bronzing/highlighting. The brush is also large enough to apply bronzer onto your shoulders/legs.

Would I recommend? Yep!

F50 - Duo Fibre Brush


I had the highest hopes for this brush, as I LOVE these types of brushes, however, this let me down the most! The website states it creates an 'airbrush' look, but upon application it left a streaky finish on my face, which was disappointing. 
If you are after a duo fibre brush, then I would recommend the elf Stipple Brush, which is A LOT cheaper and creates a flawless look.
Or, the Real Techniques Brush is another favourite, which is a little more expensive than the elf version.

Would I recommend? No.

F40 - Large Angled Contour Brush
I had been using the elf Angled Blush Brush before using this Sigma brush, and I was relatively happy with it - but now? I don`t even know where it is. I use this F40 brush every time I contour. I love it. It picks up enough product and the bristles are nice and soft to the touch. You do need a light hand when applying, but that goes without saying anyway when it comes to contouring.

Would I recommend? Yes.

F60 - Foundation Brush
This, again, was a disappointment just like the F50. But, in general, I don`t like these types of brushes for application of foundation as they generally do have the streaky look and doesn`t look very flawless. However, the bristles are soft and applies better than the Clinique Foundation Brush (which I`d been using before) where the bristles aren`t as soft.

Would I recommend? No.

EYE BRUSHES


E40 - Tapered Blending Brush


Prior to this brush, I had been using the Urban Decay Crease Brush for blending my eyeshadow. The brush is fantastic. Silly to replace it, to be honest. However, this Sigma brush is a little more fluffier. So, I use both.
Another alternative is the Mac 217 Blending Brush, which is a favourite with all Bloggers and YouTubers!

Would I recommend? Yes.

E60 - Shader Brush
I use this to apply all over eyeshadow on the eyelid. The brush itself is fairly broad and larger than the Urban Decay Shadow Brush so it is good and more ideal if you`re only applying one colour.

Would I recommend? Probably not. I think you can live without this specific brush. 

E70 - Medium Angled Shading Brush
I use this brush to blend in my crease. I do like this brush as the shape is softer than the Boots No. 7 Brush that I used, which had a more sharper angle. I also use this sometimes when I want to contour a little bit for a more natural look.

Would I recommend? Yes.

E55 - Eye Shading Brush
I don`t really use this brush as I just it to put on eyeshadow, or to even just apply to the lower lashline for a smokey effect - I could totally be doing it wrong lol!

Would I recommend? No, well until someone tells me what I`m supposed to do with it?


F70 - Concealer Brush
I don`t really use this concealer brush as I purchased the P80 Precision Flat Brush with this kit and I use that instead. You can find more out about it below. But, if I do use it, I use it to conceal under my eyebrows.

Would I recommend? No.

E30 - Pencil Brush
I use this brush for applying darker eyeshadow to my lashline to soften the look I`m trying to achieve or just to the outer corner to apply the dark eyeshadow precisely and using a fluffy brush to blend out.

Would I recommend? Yes, everyone needs a pencil brush in their brush collection.

E65 - Small Angle Brush
I absolutely adore this brush, and like a few of the other brushes, I do use this everyday, as I use it to shape my eyebrows. And, doing my eyebrows is something I HAVE to do. I cannot leave the house without doing it, even if it means no make up for the rest of my face - my eyebrows MUST be filled. This brush is perfectly thin and precise. I love it.

Would I recommend? 100% yes!

E05 - Eyeliner Brush
I don`t really use gel eyeliner much, but when I do, I do use this brush. I don`t think it is thin enough for the level of thickness I like to achieve when I do use gel eyeliner, however, it is an essential for a brush collection, and the thickness will most likely be suffice for other people.

Would I recommend? Yes, I`m just exceedingly fussy!


P80 - Precision Flat Brush


This brush I had purchased along side the Bunny Kit, and I think it is a fantastic flat head brush. I use it to apply concealer on a day to day basis and I carry it in my travel make up bag, thus it is always on had. Its a mini stippling brush with precise application. I love it.

Would I recommend? 100%

You also get a free eyeshadow sample with your purchase, and I received this gorgeous coral shade, Grasp!


Verdict: In whole, I do love Sigma brushes. The quality of these brushes are fantastic. The brushes don`t shed. The application of product is fantastic. The kit is a great purchase. I have yet to purchase any more brushes and I feel these have been a good investment. I don`t think the overall price is worth it, especially taking into consideration the customs tax, however, I don`t dwell on this and focus on how flawless my bronzer looks - hehe!

Would I recommend? The kit as a whole? Probably not. Individually? Yes. I would recommend researching and reviewing every single brush you want properly and working out whether the kit or purchasing individually would work out more beneficial for yourself.

How about you? Do you have any Sigma brushes? If so, which? And, do you have a favourite?

xo

P.S. Make sure to like my Facebook Page.
P.S.1. Also, are you following this blog? If not, click here to do so.
P.S.2. I`m over on Twitter and Instagram under username @mangowhirl, so search, follow and message me :)

Friday, November 15, 2013

MW's Review: Urban Decay The Vice 2 Palette

Hi Whirlers,

Today's post is on the beautiful Urban Decay Vice 2 Palette, which has come out quite recently! 

This palette is the partner in crime to the original Vice Palette, which came out around this time last year. It is now discontinued, unfortunately. I raved about the original palette in my review, however, I personally feel this second palette is much more up my street as the colours are much more subdued and more approachable by one who doesn`t have much confidence with bright colours. 

The size is exactly the same as the original and with exactly the same brush included. The packaging of the palette is much sleeker compared to last years palette, which had a more rubbery feel (like Nars packaging) and resulted in more dust/dirt attraction, resulting in less of a cleaning issue. Again, this year, they have included the faux diamond UD branding on the cover of the palette, which again could potentially cause an issue when storing away.


The colour pigmentation could cause no issue for me, as I feel Urban Decay have the best high quality eyeshadows out there (yes, I prefer them over MAC!) and I have not been left disappointed. The palette consists of a mix of mattes and shimmery shades (only 5 matte shades). The colours are long-lasting and vibrant. 


(with flash)
(without flash)
L-R: Smokeout, Lovesick, Shellshock, Coax, X-Rated
First RowFrom the first row, you can see all five shades are heavily pigmented, especially Shellshock (silver). My favourite shade from this row is Smokeout, which is a deep matte brown, and I feel it would be gorgeous for a brown smokey eye, where you don`t want to use black for the outer corner. Lovesick (black shimmer) is probably the least pigmented on this row. This is probably my least favourite row, however.

L-R: Prank, Madness, Strike, Stash, Poison
Second Row
This row is most definitely my favourite row of shades from this palette. The colours are so gorgeous, heavily pigmented and rather vibrant for such deep colours. Just look at the swatch *love*. I love how gorgeous Madness (blue) is and how Strike (gold) is the perfect shade of gold for my skintone!! And, we all know how obsessed I am with the colour khaki, so Stash was very appealing to me! And, I just love how Prank (matte navy) is so pigmented. 

L-R: Radar, Damaged, Voodoo, Betrayal, Derailed
Third Row
This is probably my third favourite row, as Damaged (green) and Radar (brown) are just so heavenly...in an earthly kind of way! This row lets me down with the purple shades, being Voodoo and Betrayal, as I don`t really wear purple eyeshadow, as I don`t have many purple clothes, so I feel I wouldn`t get much use out of those colours.

L-R: Dope, Toxic, Habit, Ambush, Rewind
Fourth Row
The final row, is my second favourite row, as there are three matte shades in this row and they`re neutral colours, which make them wearable on an everyday basis. I can`t pick a favourite from this row, but Toxic (coral shimmer) looks absolutely stunning on my skintone and I`ve been using Habit (peach matte) quite a lot lately all over the eyelid and only using a matte brown to add depth on my sockets. So, I am loving this row.

Verdict: I love this palette, much more accessible compared to Vice, as the colours are more muted. Would make a wonderful present for a girl who wants to start experimenting with eyeshadows. As the Naked Palette 3 is out in December in the UK, I would personally recommend purchasing the Vice 2 palette as it is a limited edition and the Naked Palettes are part of the permanent line.

As for price worthy? I think these palettes are most definitely always worth it. Have a look at my original post, to see how I calculated and justified my purchase....just don`t blame me when you keep buying new things!

How about you? Have you already purchased this palette? Are you lusting after it?

RRP: £42.00
(but, currently on sale in Debenhams for £37.80!)
(Urban Decay can be purchased from Debenhams and House of Fraser)

Let me know, by commenting below!

xo

P.S. I also think my swatching has improved since last year - result!

P.S.1. Make sure you catch me on all of the social media platforms out there - just search for 'mangowhirl'!


Thursday, August 8, 2013

MangoWhirl's Everyday Look

Hey Whirlers,

Firstly, Eid Mubarak! :) May all our duas and fasts be accepted, insha`Allah.

As it was requested by a number of you beauties, I have uploaded a make up related video - which I enjoyed doing...so be prepared to watch more get ready with me videos!

So, the video I did was my 'Everyday Look', have a watch and let me know what you think:


You can also see how I contour myself and note how excited I get haha!

Products used on an everyday basis:

- HD Brows Palette in Vamp (I used shade Carbon on my eyebrows)
I used a Sigma Small Angled Brush E65 to apply

- Almay Bright Eyes Eye Base + Concealer in 145 Medium - Moyen
I used a Sigma Precision Flat P80 to apply

- Urban Decay 24/7 Glide-On Eye Pencils in Zero

- L'Oreal Super Liner Perfect Slim in Intense Black

- KIKO Luxurious Lashes in Black (I think, doesn`t state on the packaging)

- MAC Studio Finish Concealer in NC42
I used a Sigma Precision Flat P80 to apply

- Sleek Face Form Palette in Dark
I used a Sigma Large Angled Contour Brush F40 to apply

Urban Decay  Naked Flushed Palette
I used a Sigma Large Powder Brush F30 to apply

- The Balm Cosmetics Mary-Louminizer
I used a Real Techniques Contour Brush to apply

L'Oreal 6 Hour Glam Shine in 200 Mauve
I used a Real Techniques Detailer Brush to apply

Scarf is from Whitechapel Market and the pin is a standard straight pin (purchased off Amazon) and painted to a nail polish colour of my choice! 

Hope you enjoyed!

Do let me know if you have any video requests and I will try my best to do them!

Much love,
MW xo

P.S. Do comment, like and subscribe :) And, check out where else you can catch me:

TWITTER: http://twitter.com/mangowhirl
INSTAGRAM: http://instagram.com/mangowhirl
FACEBOOK PAGE: http://www.facebook.com/MangoWhirl

Sunday, February 10, 2013

MW's Three Shades of Contouring

Hello,
Today's post is on the Sleek Contour Kit (SCK) - which I absolutely adore. If you don`t have one in your make up collection, I genuinely don`t know what you are doing with your life! Go buy one and embrace the wonderful life of contouring!!

There are fifty three shades available of the SCK:
LIGHT | MEDIUM | DARK
Retailing at around £6.49 on Sleek's website or in Superdrug where if you buy in-store you can also get 10% off with a valid student card.


There tends to be a wary approach by girls when it comes to contouring, especially as it is such a daunting colour being applied to their faces. Not wanting to look stupid, unfortunately, girls back away from the SCK, but its SUCH FUN, I promise.
Looking at these three palettes side by side, the darkest can look pretty frightening, however, hopefully this post will put a little more confidence in you girls who are afraid to contour because they don`t want to put such a dark colour on their cheeks.

In general, these SCK are amazing. They last all day, a light powder that is buildable and the perfect shades of matte brown. What I love about these SCK, is that the kit lasts for such a long time! I use the light highlighter on an everyday basis and it doesn`t even look like it has been touched. Little product that goes a long way - perfect. I`ve used other contour/bronzing kits, and this hands down beats them - I always run back to this. One thing, like any other powder based product, I have to wait for my moisturising cream/foundation to settle before I apply the SCK - otherwise I get dark patches on my face, which looks awful. However, at £6.49, you can`t go wrong with such a fab kit.

First, I`m going to share swatches of the SCK side by side, heavily applied and then, blended, so you can see that even the dark SCK isn`t so bad on medium skin colour.
(Just to keep you aware, I wear NC30/35 Mac Foundation/Concealer.)
This is the heavily applied swatch of the SCK:
Blended swatch: 

Each shade in more detail:
LIGHT
The problem with light matte brown on my skintone is that, even after heavily applied it is JUST about visible. With contouring and bronzing, the key rule is to build up the colour until you`re happy with the end result, but if after heavily applying and I`m still not happy with the end result - its no, no from me. That being said, I adore the light highlighter on my skintone - makes me look so much more radiant and its what I use on a day-to-day basis, actually.
This is obviously perfect for lighter skintoned girls - so, if you are one of the girls who is afraid to contour and light, then buy this, and fall in love with contouring. Build confidence with a light colour and once you`re happy and love it - move upto medium!

MEDIUM
I think Medium is the perfect colour for my skintone, it creates the perfect balance of darkness and light. It looks like a natural colour on my skin tone. This is a great colour, that you can build up and create a darker shadow - which is fantastic when you`re feeling a little more daring.
If you have similar skin tone to myself, then please buy this kit and experiment with contouring. Start off with a light application and build it up until you`re happy - you won`t be disappointed with this colour.

DARK
GAH. ARGHHHH. This is quite literally my favourite EVER SCK. I`m quite daring when it comes to contouring and I apply it SO heavily so I can have that really chiselled effect. I do make it look more Edward Scissorhands than Kim Kardashian, though but I don`t care - I love applying it and I have such fun doing it. In the swatch, it does look scary, but once blended it looks completely fine. I apply the dark brown matte and the light highlighter together and I love the end result - such a contrast but looks so good!
On days when I`m too lazy to contour, I apply the dark highlighter on my cheeks for a nice bronzed effect - looks great on medium skintones!
If you`re medium skintoned and love contouring and bronzing - then use the Dark SCK - you will love, and not look back!

Wow - sorry thats a really lengthy post, but I love the SCK and I had to share!

If you want to know how I contour and bronze, check out my photo tutorial here.

and, if you want to see a video, check out a recent video tutorial here.

Let me know if you use it, and if you don`t - then go buy it and let me know what you think - so comment below. I always reply :)

xo

P.S. Make sure to like my Facebook Page.
P.S.1. Also, are you following this blog? If not, click here to do so.
P.S.2. I`m over on Twitter and Instagram under username @mangowhirl, so search and follow, please :)

Wednesday, February 6, 2013

MangoWhirl and MissBeautyAdikt's January Favourites

Hello Whirlers,

Here is another video from our day together. We opted to do a January Favourites.

This is over on MissBeautyAdikt's YouTube Channel, which is here.


Hope you enjoyed it!

If there are any questions, comment below!

If you haven`t already subscribed to her channel, then do so. Make sure you check out her blog as well, its great! 

MangoWhirl
xo

Sunday, February 3, 2013

MangoWhirl's Contouring Session with YazMakeUpArtist

Hey Whirlers!

Miss Beauty Adikt popped over for a visit and we decided to do videos for our channels!

On my channel we FINALLY have the contouring/highlighting video:


1. Find the hollows of your cheeks, and using the darker matte shade, use that to create the contour. As you can see from the video, Yaz built it up, so it was a gradual process of applying, then blending, and applying until she created the perfect contoured effect on my face.
Don`t forget to apply the same matte shade to your jawline.
2. Find the high part of your cheeks which would hit the light, and apply highlighter there, again, building it up.
3. Smile. At the apples of your cheeks apply blush.

And, you`re done!

If there are any questions, then comment below or email me. 

Hope you enjoyed the video, and let us know if you would like to see more! :)

Mangowhirl
xo

Thursday, January 10, 2013

MW's Updated Review: Neutrogena Pink Grapefruit Daily Scrub

Hey Whirlers,

Hope you`re all well and embracing the new year with positivity! :)

I thought I would do an updated review of the Neutrogena Grapefruit Daily Scrub, because the one I did previously here, was when I first started blogging and was a little clueless on how these product reviews worked. In fact, I probably am still clueless (look at my swatches here -horrendous). 

But here goes for take two:

Product: Neutrogena Grapefruit Daily Scrub

Price Range: £4.50-ish, sometimes you get amazing 2-for-1's in Superdrug/Boots - so keep an eye out for that bargain.

What the packaging says
'helps eliminate spots and blemishes with a fresh clean feel'
Does it?
Yes, it does.  
This product contains Salicylic Acid, which is a key ingredient in anti-acne treatments because it opens clogged pores, neutralises bacteria within and prevents pores from clogging and allows new cells to grow. This is where the 'scrub' part of the product comes into action as the Acid works as an exfoliant and gets rid of the old cells. Which in effect is eliminating the spots and blemishes to leave you with a fresh face.

'An uplifting daily facial scrub for clear, fresh and healthy looking skin everyday...exfoliating micro-beads, the formula unclogs pores to clean deeply and help eliminate spots and blemishes'
Does it?
Yes, it does.
I have the tendency to be drawn to scrubs, as I feel these types of products are better to remove the dirt you build up throughout the day compared to a normal gel face wash.
This scrub is good because the exfoliant beads are actually all a consistent size which is great, in my opinion. I`ve tried other face scrubs where the beads are different sizes, so I don`t like that feeling on my face, I prefer to have a smoother consistency - if that makes sense, considering there are beads in this scrub.


'...refreshing scrub gently purifies the skin without overdrying, while a wave of pink grapefruit uplifts the senses with a burst of invigorating freshness.'
Yes, it does.
I use this product twice a day, and after I dry my face it doesn`t feel dry at all. My skin doesn`t tighten, either. And, the smell? So divine, fruity, summery and fresh. This product will waken you right up in the morning and you will go to sleep with a fresh feeling.

Why I love scrubs:
If you`re washing a plate (yes, I`m using a plate as an analogy for a face) with fairy liquid but you just use your hands and not the scouring pad - you`re only going to remove some of the dirt but if you use the scouring pad WITH the gel, you remove much more dirt, leaving your plate cleaner. The exfoliant beads in a face scrub...those are my mini scouring pads all over my face (lol). So, bearing that in mind, using the scrub on a daily basis, removing the dirt, it does leave my face feeling fresh, clean and healthy looking!

Sensitive skin:
I`m not sure how this product will be with sensitive skin, but I don`t like using harsh products on my face as I break out - I have yet to break out from this product. So, if you have sensitive skin, try it - but don`t vouch me for it!

Recommend this product
In my first review I said I would recommend this to anyone that will listen, and I still stand by that statement. It is an amazing product with amazing results. 
This type of product is fantastic for those who pick their spots and leave marks *guilty*, a week or so of using this product daily, you will notice a dramatic difference to your skin, the marks will have started to fade and you will have more of a glow on your face. 
Because of the exfoliant beads, you really do leave with a deep clean feel, which can only result in confidence ;)
I have always had positive feedback from girls who have used this product through my recommendation, which I love because I do want to share how great this product is.

There are other types of face washes in this Neutrogena Pink Grapefruit Visibly Clear range, being gel face wash and a cream wash - I have tried only the gel face wash, but it isn`t nearly as good as the face scrub (think of my fairy liquid example - no scouring pad!). Although, that one is designed for more oily skin. I still think everyone should try the scrub. I have yet to try the cream wash, but I have tried other Neutrogena cream washes and they are moisturising, but this isn`t what I`m after in a face wash. I`m after a product that will get deep into my pores and remove the dirt, which I believe only a face scrub can do - so I recommend the face scrub to notice the effects. 

Another thing I love about this product is that only a little bit is required per wash, so the product lasts for months! 

Cons:
After a while of using it, I have probably been using it for a couple of years, you do become immune to the smell of the fresh grapefruit-ness. But, this isn`t too much of a big issue for myself as I`d rather have the benefits of the Salicylic Acid working on my face and removing marks! 
This range also has a moisturising cream, I did a review for that here - but, in short, its overrated.

Besides that, there aren`t many cons to this product!

Conclusion: I love this product. I go on about this product all the time. It is my beauty secret that I love to share.

BUY IT. TRY IT. LOVE IT.
And, let me know what you think about it! 

xo

P.S. I`m liking these beauty kind of posts - weather is awful at the moment so unable to do many OOTDs :( - Hope you`re liking them, as you may get more!

P.S.1. Make sure to like my Facebook Page.
P.S.2. Also, are you following this blog? If not, click here to do so.
P.S.3. I`m over on Twitter and Instagram under username @mangowhirl, so search and follow, please :)

Thursday, November 22, 2012

MW's Review: Urban Decay The Vice Palette

Hello my lovelies,

How are you all? 

I was a little cheeky and purchased 'The Vice Palette' by Urban Decay, and I thought I would share photos/swatches with you:
(click on photos to enlarge)

The palette is a gorgeous purple shade, with 'UD' in a faux diamond raised kind of effect. Unlike the Naked Palette One (velvet) and Naked Palette Two (metal), The Vice Palette is made of a soft rubber texture, which is smooth to the touch. It looks very cool, although, I`m sure when it comes to putting the palette away, the raised logo will be an issue. The outer packaging was a simple cardboard box, which tried to imitate the faux diamonds effect for the 'UD' and again in the same shade of purple as the palette, itself.


The palette comes with a full size mirror, which is fantastic, as the palette is fairly large (18cm x 14cm).


In the palette, you also get a double ended brush, blending brush on one side and a crease brush on the other. It is smaller compared to the other Karma brushes that you can purchase or the ones that come with a palette, but the width is exactly the same. 


 You are greeted with 20 colours in this gorgeous palette, all of which cannot be purchased individually (as I was told by the UD sales assistant in Debenhams). The palette consists of a large spectrum of colours, where majority are shimmery, and two neutral mattes. Perfect for Asian weddings, mendhi`s, etc!


(photo without flash)

(photo with flash)


1st row: (l-r) Desperation, Muse, Jagged, Blitz, Penny Lane
2nd row: (l-r) Junkie, Chaos, Occupy, Unhinged, Black Market

These colours are absolutely gorgeous! The eyeshadows, being true to Urban Decay's reputation are highly pigmented. My favourite from the first two rows are Muse, Blitz and Junkie - amazingly pigmented. I mean, look at Muse, that was ONE swipe! Love it! Unhinged was also a highly pigmented shadow, which I cannot wait to experiment with. Chaos looks SO electric and vibrant in the palette, but it seemed a little chalky when I swatched it and needed to swipe it a few times to build up colour, which I was disappointed with. 


3rd row: (l-r) Provocateur, Rapture, Vice, Noise, Armor
4th row: (l-r) Nevermind, Echo Beach, Anonymous, Freebird, Laced

Amazing girly colours. Provocateur, Armor and Vice being my favourite from the 3rd row. Again, highly pigmented shades. Noise was also disappointing like Chaos, where I needed to swipe it a few times to build up the colour for the swatch. 
I was further disappointed with the 4th row, where they had two matte neutral shades Anonymous and Laced, which like Noise and Chaos, were very chalky and not very pigmented. This also meant having to build up the swipes simply for the swatch. Besides that, Nevermind, Echo Beach and Freebird are gorgeous neutral shades, Nevermind being my favourite. 

RRP: £42.00
(but, currently on sale in Debenhams for £37.80!)
(Urban Decay can be purchased from Debenhams and House of Fraser)


Verdict: I think this palette is most definitely worth the money, simply because an individual UD eyeshadow is £14.00, weighing at 1.5g. This palette consists of 0.8g (which is a little over half) making each individual eyeshadow a little over £7. 
If we stick to the price of £7 for each eyeshadow in the palette, then 
£7 x 20 = £140
Lets not forget the make up brush, a blending brush is £17.50 and a crease brush is £14.50, making the average between the two, £16.00. As the brush is smaller, we`ll knock off a few pounds - and I`m estimating the retail price for this brush to be £14.00. Even then, that is included into the palette price! Making the full price for the palette to be £154.00, retailing at £42.00!
Amazing, right?

Most definitely a bargain for what you`re getting (and, yes, this is how I justify my purchases haha).

Will you be buying this palette? Do you already have it? What is your favourite colour from the palette?

xo

P.S. I think I need to work on applying swatches...couldn`t do it in a straight line.

Monday, October 8, 2012

MW's Contouring Ways

Hello Whirlers,

Today I`m going to do something different - with a completely different approach, too.

I got asked a while back on how I contour, so I thought I`d show you:
(click on photos to enlarge)

Products used:

Sleek Faceform in Dark
NARS Bronzer Blush Trio
Blush Brush - natural bristles
Kabuki Brush
Small Brush


On with the photo tutorial:


1.  In order to create the depth in your cheeks, you will need to find the darkest matte brown powder you have and with the handle of the brush, you will need to place this on your cheek to see where you want to apply the powder (photo 2).
Once you have determined this, start applying the powder. Ensure you apply it in a 'C' motion like the photo below. These are the darkest parts of your face, so you want to emphasise these.

2. It may look daunting at the moment, having two dark streaks on your face, but using the same brush apply lighter bronzer to the area marked in the photo below. I used NARS Laguna for this. I usually suck in my cheeks at this point to see that I`m applying it to the right area - apply it to the part that catches the most light when you suck in your cheeks.  Once you have done this, blend the two products together so it looks seamless. 

3. At the point, you would apply blusher to the apple of your cheeks as the photo below. I like to then blend the blusher in with the lighter bronzer to make sure there are no harsh lines. I applied NARS Orgasm for the blush - a favourite of mine.


4. This is where you highlight. As you can see from the photos above, it is all of the photos on the bottom row. You would do the upper cheek (which is just below the eyes), the T-Zone and your brow bone - the photo below shows where you should apply the highlighter. It is preferable to use a small headed brush at this point as you only want to apply a small amount. Also, as I was using NARS Albatross - you only need a little bit to go a long way, so had to be able to control it. For the T-Zone, I like to use a fatter headed brush, and I seek my kabuki brush for this part, where I lightly brush it over my forehead and down the bridge of my nose. A point to remember, never do the tip of your nose. Its also nice to apply a little bit of highlighter to the cupid bow on your lip - this is great to make your upper lip look larger! 


5. After all that is done, I like to swirl the kabuki brush all over the face to ensure it is all blended well and there are no harsh lines.

Final result:
(don`t ask what I`m doing with the brush - I can`t pose without doing something with my hands :/ )  


For the rest of my face, I used:

Foundation - Christian Dior Forever Skin in 030 Honey Beige
Concealer - MAC Studio Fix in NC42
Mascara - L`Oreal Volume Million Lashes in Extra-Black
Eyebrows - HD Brows in Dark Brown
Eyeshadow (lightly applied to lower lashline) - Urban Decay Toasted
Lips - Rimmel in 136 Ballistic

So, what do you think? Easy to follow? Should I do more of these? If you like, and have a specific request - do let me know, will try my best!

xo

P.S. Make sure to follow me on twitter, instagram, bloglovin` and facebook! I`m easy to find, just type in 'mangowhirl'!